

Bonjourno!
Nail Art. Simple Nail art.
Grabbed your attention yet?
Fancy some super cute, super easy daisies for your fingers? The best thing about this design is it is made up of dots so it makes adorning the right hand a doddle (why do you think all my photos are off my left hand - it looks better!). So Follow my step by step guide for cute daisies.
You can use any colour combination you like so grab some polishes and move to step one....
For the dotting tool, I used a hair grip. If you have fancy dotting tools they work just as well :P
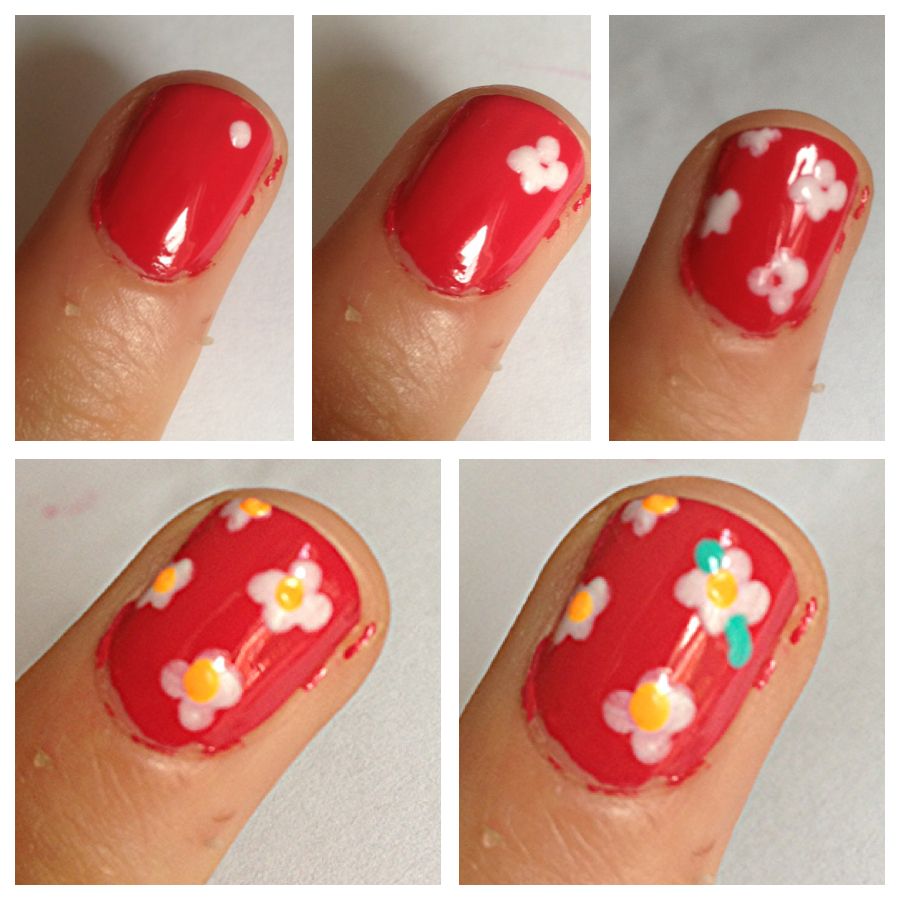
Step 1)
Paint the nail in any colour you desire. Here I have used No7 Gel Shine in 'Hotting Up'
Step 2)
Grab your dotting tool of choice. I'd put a bit of polish onto a piece of paper for ease. Lightly dip it in then dob onto the nail (four dots close together)
Step 3)
Add Some more flowers. Remember the edges!
Step 4)
Now clean your dotting tool and grab your next colour, the one for the centre of the flower. Here I used Models Own 'Beach Party'. Put one dot of this colour to the centre of each of your flowers.
Step 5)
Now for leaves. Clean the tool, dip into your polish and apply two dots opposite each other. Do all the flowers or for a different take only add leaves to one or two. (Barry M 'Greenberry for those of you who are interested'
Step 6)
Whilst waiting to try, clean the nail edge with acetone and a brush/cotton bud.
Step 7)
When completely dry, top coat it baby! Dab rather than drag to make sure you don't smudge.
Step 8)
Admire your handiwork! Take photos, instagram that stuff!


Aw this looks so cute!ive always been scared to try doing flowers but these look great and quite simple!:)
ReplyDeleteCompared to your Cheetah print this is really easy! You should try it! x
ReplyDelete